|
|
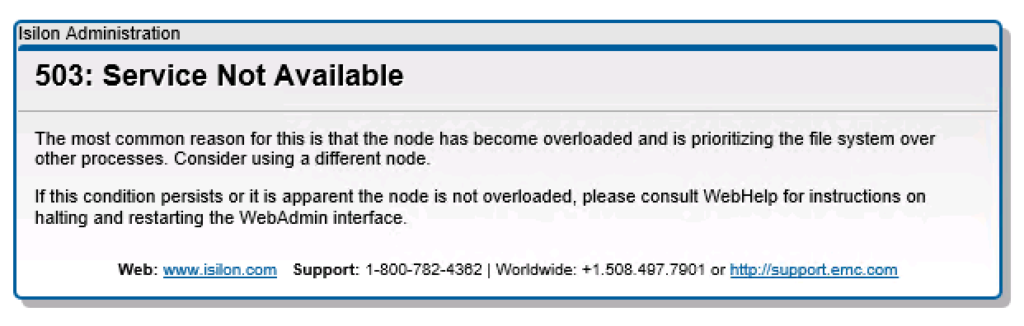
If you try to login to Ision Administration web GUI interface and get the following message:
Isilon Administration
503: Service Not Available
The most common reason for this is that the node has become overloaded and is prioritising the file system over other processes. Consider using a different node.
To resolve this issue please run the following on the node where you have the problem.
webui_webware_ctl restart
This resets the admin gui on a node.
isilon01-1# webui_webware_ctl restart
/usr/local/sbin/webui_webware_ctl restart: webware (54373) stopped
According to the pid file, the server is still running.
Trying to terminate the server with pid 77496...
Server with pid 77496 has been terminated.
Starting WebKit.ThreadedAppServer...
Output has been redirected to '/var/log/webui_webware.log'...
/usr/local/sbin/webui_webware_ctl restart: webware (77498) restarted
Hope this will help.
The Beginner’s Guide to managing the NSX Distributed Firewall with Security Policies
In an earlier article, I covered what the basics of the NSX Distributed Firewall allow you to accomplish. Now let’s take a deeper look at those concepts and figure out the best way to apply th…Read More
VMware Social Media Advocacy
Goodbye, vSphere Web Client!
VMware plans to deprecate the Flash-based vSphere Web Client with the next numbered release (not update release) of vSphere. The next version of vSphere will be the terminal release for which vSphere Web Client will be available. The vSphere GUIs, including the vSphere Web Client and HTML5-based vSphere Client, are tools that are used every day The post Goodbye, vSphere Web Client! appeared first on VMware vSphere Blog .
VMware Social Media Advocacy
LDAP integration has been configured on Isilon InsightIQ v. 4.1.1.3 and LDAP groups assigned to the appropriate InsightIQ Roles (admin or read-only). N.B. Nested LDAP group are NOT supported, nested LDAP groups do NOT inherit permissions.
When we tried to login, we received the following error message:
You are not a member of a privileged LDAP group in InsightIQ. Please contact your administrator to receive login access.
We were absolutely confident there was nothing wrong with the LDAP server or group membership. We have had some other issues with OpenDJ LDAP implementation in the past therefore we knew we need to dig dipper.
There are so many LDAP implementations and some Directory Service attributes are different to the standard. In this particular case we had to work with OpenDJ 2.6.3 where, for example, the ‘Member Of‘ Attribute is called ‘isMemberOf‘ insted of standard ‘memberOf‘.
Isilon InsightIQ interface does not allow you to change the Advanced LDAP Settings like Isilon OneFS does therefore it is not possible to amend the ‘Member Of ‘ attribute through InsightIQ GUI and you need to edit the configuration files:
- Login to the console or SSH to the InsightIQ appliance as
administrator;
- Navigate to
/usr/share/isilon/lib/python2.7/site-packages/insightiq/controllers/;
- Edit
security.py as the following:
- FROM:
# Group roles list is sorted by role with admin groups first
for group in self.ldap_service.fetch_group_roles():
    # Search for membership of specified user in privileged group
    # This should cover all RFC 2307 compliant AD servers
    search_str = self.ldap_service.filter_format(
          '(&(objectClass=%s)(memberOf=%s)(uid=%s))',
          [user_object_class, group['dn'], username])
    conn.search(search_dn, search_str)
- TO:
# Group roles list is sorted by role with admin groups first
for group in self.ldap_service.fetch_group_roles():
    # Search for membership of specified user in privileged group
    # This should cover all RFC 2307 compliant AD servers
    search_str = self.ldap_service.filter_format(
          '(&(objectClass=%s)(isMemberOf=%s)(uid=%s))',
          [user_object_class, group['dn'], username])
    conn.search(search_dn, search_str)
- Save the file;
- Restart InsightIQ.
Hope this will help.
vExpert 2017 Award Announcement And for a third year in a row, I’m a vExpert!

First we would like to say thank you to everyone who applied for the 2017 vExpert program. I’m pleased to announce the list 2017 vExperts. Each of these vExperts have demonstrated significant contributions to the community and a willingness to share their expertise with others. Contributing is not always blogging or Twitter as there are many public speakers, book authors, CloudCred task writing, script writers, VMUG leaders, VMTN community moderators and internal champions among this group.
VMware Social Media Advocacy
After installing Management Pack for NSX for VMware vRealize Operations Manager, I got a warning that “There is no syslog server configured on the NSX Controller”

The only “supported” method of configuring syslog server for VMware NSX for vSphere 6.x Controllers is using the REST API.
Before you begin configuring the Syslog service using the REST API, there are a couple of things you need to have in place:
- REST API Client. For example, RESTClient Add-On for Mozilla Firefox browser.
- Authentication header.
The request body to configure this is fairly straight forward, as there are only a few elements that can be configured.
<controllerSyslogServer>
<syslogServer>10.160.20.1</syslogServer>
<port>514</port>
<protocol>TCP</protocol>
<level>INFO</level>
</controllerSyslogServer>
Before we begin configuring the Syslog service using the REST API, let us take a brief look at what REST client(s) are available to enable us to quickly perform this configuration programatically.
Once you are done with enabling either of these plug-ins, you need to know couple of other pieces of information before you send the REST request body to the NSX for vSphere Manager to setup the Syslog for NSX for vSphere Controller.
First of all REST API Requests require Authentication header (REST Client will Base 64 Encode the Credentials for NSX for vSphere Manager. Also PUT or POST (If sending HTTP Body) will require you to set an additional Header. There are as below:
- Name = Content-Type
- Value = application/xml
Confirm Authorization & Content-Type headers are properly setup.
- If you want to retrieve details about the configured syslog exporter on the specified controller node, you need to send this HTTP request.
Method: GET
Request: https://<nsxmgr-ip>/api/2.0/vdn/controller/{controller-id}/syslog
No Syslog configured:

- To configure syslog server(s) paste the request in the Request Body and change the method to POST:
Method: POST
Request: https://<nsxmgr-ip>/api/2.0/vdn/controller/{controller-id}/syslog

- If you want to delete the syslog exporter on the specified controller node then use this HTTP request.
Method: DELETE
Request: https://<nsxmgr-ip>/api/2.0/vdn/controller/{controller-id}/syslog
Please refer to VMware KB Article “Configuring syslog server for VMware NSX for vSphere 6.x controllers (2092228)” for more details.
VMware: vCenter 5.5 Update 2d in Linked Mode
OS: Windows Server 2012 R2
vCenter SSO: Multisite deployment
VMware vCenter 5.5 Update 2e: Release Notes & Installation and Upgrade Issues
I tried to upgrade VMware vCenter 5.5 from Update 2d to Update 2e. The Linked Mode was unconfigured prior to upgrade.
All services were running OK and the server had 20GB of disk space available on the C: drive. After launching the vCenter SSO installer it detected a previous version and prompted to upgrade. The upgrade took a long time and eventually prompted that the server ran out of disk space on the C: drive. On close inspection there were quite a few hs_err_PID*(.log) (where PID – Process ID) Java crash dump files generated in the following folders:
C:Program FilesVMwareInfrastructurevSphereWebClientserverC:Program FilesCommon FilesVMwareVMware vCenter Server - tc Serverbinwinx86_64
When the Java error dump files were deleted, I clicked on Retry and SSO upgrade completed successfully. Although no new Java error dump files were generated, the VMware Identity Management Service failed to start. Obviously, the vCenter Server was broken and it was not possible to upgrade other vCenter Services/Modules.
Suspecting something is not right with the VMware JRE, I rolled back the snapshot, restarted the server and tried to upgrade VMware JRE (Java Running Environment) by running VMware-jre.exe from {vCenterInstallationMedia}:vJRE folder (same as from {vCenterInstallationMedia}:Single Sign-Onprerequisites) . The upgrade completed successfully but when I attempted to upgrade SSO, I had exactly the same issues as described. Back to the snapshot… :(
Here is what you need to do to resolve this issue:
- Stop all VMware services that rely on VMware JRE:
- VMware vSphere Profile-Driven Storage Service
- VMware VirtualCenter Management Webservices
- VMware vSphere Web Client
- VMware vCenter Inventory Service
- VMware Secure Token Service
- VMware Log Browser
- VMware Identity Management Service
- Uninstall VMware vCenter Server – Java Components
- There are no files left in
C:Program FilesCommon FilesVMwareVMware vCenter Server - Java Componentsbin folder
- There are no running processes using java:
tasklist | findstr java
- Map the vCenter media of the currently installed version of the vCenter. In my environment, vCenter 5.5 Update 2d
- Install VMware vCenter Server – Java Components from {vCenterInstallationMedia}:
vJRE folder.
All services that were stopped in Step 1 will start automatically.
Restart the server to make sure all vCenter services start successfully…
- Map the target version vCenter media
- Upgrade vCenter Server
A couple of post-upgrade tips:
- Logging in to the Web Client took a VERY long time after the upgrade… As I have quite a few Web Client Plug-ins and some of them have multiple versions, I stopped VMware vSphere Web Client, copied all Plug-in folders from ‘C:ProgramDataVMwarevSphere Web Clientvc-packagesvsphere-client-serenity’ to a new Backup folder and then started VMware vSphere Web Client. Only the latest versions of The Web Client Plug-ins were copied back into the folder. That seems to help with logging in to the Web Client;
- vCenter Upgrade Manager upgrade failed but completed successfully when I enabled Internet access on the VUM server;
- If you need to check VMware Java version installed, run the following command:
C:Program FilesCommon FilesVMwareVMware vCenter Server - Java Componentsbin
>java.exe -version
java version "1.7.0_55"
Java(TM) SE Runtime Environment (build 1.7.0_55-b32)
Java HotSpot(TM) 64-Bit Server VM (build 24.55-b03, mixed mode)
Hope this will help.
The root and admin passwords for the EMC ESRS VE virtual appliance are configured during VA deployment, there is no ‘default‘ password.

If you have EMC ESRS VE 3.04 and below installed and lost admin password, you have no other option other than to re-deploy the ESRS VA.
In 3.06+ you can login to the VA console or through SSH as root and run the following command to reset admin’s password:
login as: root

emcsrs001:~ # cd /opt/esrs/webuimgmt-util/

emcsrs001:/opt/esrs/webuimgmt-util # ls
passwordAdmin passwordAdmin.sh

emcsrs001:/opt/esrs/webuimgmt-util # ./passwordAdmin.sh
************************************************************************************************
******************************************Password Reset Util***********************************
************************************************************************************************
------------------------------------------Password Specifications-------------------------------
1. Be 8 or more characters in length, with a maximum of 16 characters
2. Contain at least one numeric character
3. Contain at least one uppercase and one lowercase character
4. Contain at least one special character such as ` ~ ! @ # $ % ^ & * ( ) - _ = + [ ] { } ; < >
5. Do not use special characters / ? : , . |  ' and " as part of the password
------------------------------------------------------------------------------------------------
------------------------------------------------------------------------------------------------
************************************************************************************************
************************************************************************************************
Provide the password to be set for the user admin:Margarin001!
Confirm the new password to be set for the user admin:Margarin001!
Password has been successfully reset for the user admin
I hope this will help.
I installed VMware vRealize Log Insight and configured all ESXi hosts to send logs to it. Automatic configuration failed and Log Insight suggested to configure Syslog service manually.
Here are a couple of VMware Knowledge Base articles that will help you:
OK, let’s check syslog configuration:
Default Network Retry Timeout: 180
Local Log Output: /scratch/log
Local Log Output Is Configured: false
Local Log Output Is Persistent: true
Local Logging Default Rotation Size: 10240
Local Logging Default Rotations: 20
Log To Unique Subdirectory: false
Remote Host: 10.100.20.1
Remote Host configuration is incorrect.
Configure Syslog service to send logs to a remote host:
~ # esxcli system syslog config set --loghost='udp://10.100.20.1:514,udp://10.100.150.100:514'
Got no data from process
/usr/lib/vmware/vmsyslog/bin/esxcfg-syslog --plugin=esxcli --loghost='udp://10.100.20.1:514,udp://10.100.150.100:514'
Configuration command failed with “Got no data from process” error message.
Let’s check if the syslog service is running:
~ # ps | grep -i syslog
38072906 38072906 vmsyslogd  /bin/python
38072907 38072906 vmsyslogd  /bin/python
38072908 38072906 vmsyslogd  /bin/python
38072909 38072906 vmsyslogd  /bin/python
..and check the syslog service log:
~ # tail /var/log/.vmsyslogd.err
2016-01-04T17:22:02.499Z vmsyslog.loggers.file : ERROR ] Gzip logfile /scratch/log/vmkernel.0.gz failed <type 'exceptions.MemoryError'>
2016-01-04T17:22:04.451Z vmsyslog.loggers.file : ERROR ] Gzip logfile /scratch/log/vmkernel.0.gz failed <type 'exceptions.MemoryError'>
2016-01-04T17:22:06.364Z vmsyslog.loggers.file : ERROR ] Gzip logfile /scratch/log/vmkernel.0.gz failed <type 'exceptions.MemoryError'>
2016-01-04T17:22:08.312Z vmsyslog.loggers.file : ERROR ] Gzip logfile /scratch/log/vmkernel.0.gz failed <type 'exceptions.MemoryError'>
There are error messages in the log.
OK, let’s kill syslog processes:
~ # kill -9 `ps -Cuv | grep syslog | awk '{print $1}'`
…and reconfigure syslog again:
~ # esxcli system syslog config set --loghost='udp://10.100.20.1:514,udp://10.100.150.100:514'
No error message this time.
Check syslog configuratio again:
~ #  esxcli system syslog config get
Default Network Retry Timeout: 180
Local Log Output: /scratch/log
Local Log Output Is Configured: false
Local Log Output Is Persistent: true
Local Logging Default Rotation Size: 10240
Local Logging Default Rotations: 20
Log To Unique Subdirectory: false
Remote Host: udp://10.100.20.1:514,udp://10.100.150.100:514
All good.
Hope this will help.
I have been tasked to migrate several VMs with RDM disks between storage arrays / datastores. The data LUNs have been migrated/copied and all was left is the migration of the VM configuration files and RDM pointers. To make matter even worse, VMs in question were Oracle RAC clustered VMs therefore is was imperative to migrate the disks and SCSI IDs in “like it was before” way.
Let me start with a script that lists VM’s virtual and RDM disks, SCSI IDs and Disk Device Name and files names:
$DiskInfo= @()
foreach ($VMview in Get-VM node001, node002 | Get-View){
foreach ($VirtualSCSIController in ($VMView.Config.Hardware.Device | where {$_.DeviceInfo.Label -match "SCSI Controller"})) {
foreach ($VirtualDiskDevice in ($VMView.Config.Hardware.Device | where {$_.ControllerKey -eq $VirtualSCSIController.Key})) {
$VirtualDisk = "" | Select VMname, SCSIController, DiskName, SCSI_ID, DeviceName, DiskFile, DiskSize
$VirtualDisk.VMname = $VMview.Name
$VirtualDisk.SCSIController = $VirtualSCSIController.DeviceInfo.Label
$VirtualDisk.DiskName = $VirtualDiskDevice.DeviceInfo.Label
$VirtualDisk.SCSI_ID = "$($VirtualSCSIController.BusNumber) : $($VirtualDiskDevice.UnitNumber)"
$VirtualDisk.DeviceName = $VirtualDiskDevice.Backing.DeviceName
$VirtualDisk.DiskFile = $VirtualDiskDevice.Backing.FileName
$VirtualDisk.DiskSize = $VirtualDiskDevice.CapacityInKB * 1KB / 1GB
$DiskInfo += $VirtualDisk
}}}
$DiskInfo | sort VMname, Diskname | Export-Csv -Path 'd:DiskInfo.csv'
# You can also use FT -AutoSize or Out-GridView if it helps
The script output shows everything you need to complete the migration successfully:
| VMname |
SCSIController |
DiskName |
SCSI_ID |
DeviceName |
DiskFile |
DiskSize |
| Node001 |
SCSI controller 0 |
Hard disk 1 |
00:00 |
|
[My_Datastore_1] Node001/Node001.vmdk |
70 |
| Node001 |
SCSI controller 1 |
Hard disk 10 |
01:08 |
vml.0200240000514f0c5ff200006e587472656d41 |
[My_Datastore_1] Node001/Node001_11.vmdk |
2 |
| Node001 |
SCSI controller 1 |
Hard disk 11 |
01:09 |
vml.0200470000514f0c5ff200006f587472656d41 |
[My_Datastore_1] Node001/Node001_12.vmdk |
10 |
| Node001 |
SCSI controller 1 |
Hard disk 12 |
01:10 |
vml.0200480000514f0c5ff2000070587472656d41 |
[My_Datastore_1] Node001/Node001_13.vmdk |
2 |
| Node001 |
SCSI controller 0 |
Hard disk 2 |
00:01 |
vml.02000d0000514f0c5ff2000047587472656d41 |
[My_Datastore_1] Node001/Node001_1.vmdk |
30 |
| Node001 |
SCSI controller 0 |
Hard disk 3 |
00:02 |
vml.0200290000514f0c5ff2000048587472656d41 |
[My_Datastore_1] Node001/Node001_2.vmdk |
30 |
| Node001 |
SCSI controller 1 |
Hard disk 4 |
01:00 |
vml.02002c0000514f0c5ff200004b587472656d41 |
[My_Datastore_1] Node001/Node001_3.vmdk |
5 |
| Node001 |
SCSI controller 1 |
Hard disk 5 |
01:06 |
vml.0200450000514f0c5ff2000064587472656d41 |
[My_Datastore_1] Node001/Node001_9.vmdk |
100 |
| Node001 |
SCSI controller 1 |
Hard disk 6 |
01:04 |
vml.0200440000514f0c5ff2000063587472656d41 |
[My_Datastore_1] Node001/Node001_7.vmdk |
5 |
| Node001 |
SCSI controller 1 |
Hard disk 7 |
01:03 |
vml.0200430000514f0c5ff2000062587472656d41 |
[My_Datastore_1] Node001/Node001_6.vmdk |
125 |
| Node001 |
SCSI controller 1 |
Hard disk 8 |
01:05 |
vml.0200420000514f0c5ff2000061587472656d41 |
[My_Datastore_1] Node001/Node001_8.vmdk |
5 |
| Node001 |
SCSI controller 0 |
Hard disk 9 |
00:03 |
|
[My_Datastore_1] Node001/Node001_10.vmdk |
21 |
| Node002 |
SCSI controller 0 |
Hard disk 1 |
00:00 |
|
[My_Datastore_2] Node002/Node002.vmdk |
70 |
| Node002 |
SCSI controller 1 |
Hard disk 10 |
01:08 |
vml.0200240000514f0c5ff200006e587472656d41 |
[My_Datastore_1] Node001/Node001_11.vmdk |
2 |
| Node002 |
SCSI controller 1 |
Hard disk 11 |
01:09 |
vml.0200470000514f0c5ff200006f587472656d41 |
[My_Datastore_1] Node001/Node001_12.vmdk |
10 |
| Node002 |
SCSI controller 1 |
Hard disk 12 |
01:10 |
vml.0200480000514f0c5ff2000070587472656d41 |
[My_Datastore_1] Node001/Node001_13.vmdk |
2 |
| Node002 |
SCSI controller 0 |
Hard disk 2 |
00:01 |
vml.02002a0000514f0c5ff2000049587472656d41 |
[My_Datastore_2] Node002/Node002_1.vmdk |
30 |
| Node002 |
SCSI controller 0 |
Hard disk 3 |
00:02 |
vml.02002b0000514f0c5ff200004a587472656d41 |
[My_Datastore_2] Node002/Node002_2.vmdk |
30 |
| Node002 |
SCSI controller 1 |
Hard disk 4 |
01:00 |
vml.02002c0000514f0c5ff200004b587472656d41 |
[My_Datastore_1] Node001/Node001_3.vmdk |
5 |
| Node002 |
SCSI controller 1 |
Hard disk 5 |
01:06 |
vml.0200450000514f0c5ff2000064587472656d41 |
[My_Datastore_1] Node001/Node001_9.vmdk |
100 |
| Node002 |
SCSI controller 1 |
Hard disk 6 |
01:04 |
vml.0200440000514f0c5ff2000063587472656d41 |
[My_Datastore_1] Node001/Node001_7.vmdk |
5 |
| Node002 |
SCSI controller 1 |
Hard disk 7 |
01:03 |
vml.0200430000514f0c5ff2000062587472656d41 |
[My_Datastore_1] Node001/Node001_6.vmdk |
125 |
| Node002 |
SCSI controller 1 |
Hard disk 8 |
01:05 |
vml.0200420000514f0c5ff2000061587472656d41 |
[My_Datastore_1] Node001/Node001_8.vmdk |
5 |
| Node002 |
SCSI controller 0 |
Hard disk 9 |
00:03 |
|
[My_Datastore_2] Node002/Node002_3.vmdk |
21 |
To migrate both VMs to another Datastore you just need to (BTW, please refer to ‘Migrating virtual machines with Raw Device Mappings (RDMs) (1005241)‘ VMware KB article for more info):
- Using vCenter Web Client you migrate Node001 to the new datastore (this will move the RDM pointers as well);
- Remove RDM disk from the Node002;
- Migrate Node002 to the new datastore;
- Add cluster RDM disks to Node002 using the information provided by the script.
Job done.
You may also play with where command:
# Find VM with a specific RDM disk name or LUN ID :
Get-VM | Get-View | where {$_.Config.Hardware.Device.Backing.DeviceName -match "514f0c511580009f"}
# Find VM with a RDM disk on s specific storage array – c5cc2 is the LUN ID prefix :
Get-VM | Get-View | where {$_.Config.Hardware.Device.Backing.DeviceName -match "c5cc2"}
I hope this will help.
|
|
Recent Comments