|
|
I had an issue when during morning checks quite a few VMs reported “Communication Error”. On a close inspection all of them were running on a particular ESX host. DSVA’s status was “Component Update Failure”. Restart of the DSVA did not help. I vMotioned all VMs off that host and tried to deactivate DSVA but it failed. I also tried to re-activate DSVA and it got stuck on “Updating Components” again. When I rebooted DSVA, I completely lost communication to it. I noticed that it did not pickup DHCP address. When I tried to enable DHCP [X] and save Management Network Configuration, I got “dsvatool failed to config i/f (256)” error message:
")
I pressed OK, DSVA received DHCP address but Primary and Secondary DNS server IP addresses were blank. DSVA was rebooted again in a hope that it will get IP addresses properly but after the reboot it lost ALL settings, including the host name and no matter what I tried, configuration could not be saved.
Well, it is a good indication that the root partition was full.
- Open DSVA console, press ALT-F2;
- Login as dsva;
- Check the filesystems:
dsva@(none):~$ suso su
dsva@(none):~$ df -k
As you can see, DSVA’s host name is (none) – it completely lost its config

- Check the size of the logs:
cd /var/log
ls -lah
messages.1 and syslog.1 files are enormous!

- Delete syslog.1 and messages.1
dsva@(none):/var/log# rm syslog.1
dsva@(none):/var/log# rm messages.1

- Restart DSVA and reconfigure host name and IP address if needed;
- Re-Activate DSVA.
Another battle with Trend Micro Deep Security is won!
UPDATE: Trend Micro published this blog post on the Technical Support portal under Solution ID 1095482. Thank you, it is an honour!
We are currently in a process of upgrading out VMware environment to 5.0 Update 1 and therefore need to upgrade vShiled Manager and Vmware Endpoint. We managed to get Trend Micro Deep Security Virtual Appliances under control (See my “Trend Micro Deep Security: Anti-Malware Engine Offline” post) and did not want vShield Manager upgrade to break them.
Here are the steps I performed to get it all upgraded:
Before you start, please make sure all components are compatible with each other. Check VMware Product Interoperability Matrixes to confirm vShield Manager is compatible with the version of vCenter Server you are running or planning to upgrade to:

It does not matter what application, vCenter Server or vShield Manager / Endpoint, you are going to upgrade first, works either way.
Here is how you do upgrade vShield Manager and Endpoint:
- Download VMware vShield Manager upgrade bundle from VMware:
My VMware > Product & Downloads > All Downloads > VMware vSphere > VMware vShield Endpoint 5.0.2:
VMware-vShield-Manager-upgrade-bundle-5.0.2-791471.tar.gz (828Mb);
- Connect vSphere Client to a vCenter, navigate to Home > Product and Applications > vShield > Your_vCenter;
- Login to vShield Manager if needed and navigate to Settings and Reports, Updates, Upload Settings, Browse for tar.gz, click on Upload File;
- Click on Update Status, Install;

- Confirm Install;

- After installation finished, login to vShield Manager and confirm it has been upgraded;

- Verify Trend Micro Deep Security Manager connection to upgraded vShield Manager:
- Login to Trend Micro Deep Security Manager, navigate to Your_vCenter, right click and select Properties;
- Select vShield Manager tab. If you click on Test Connection it will most likely fail;
- Click Add/Update Certificate, click Accept. Confirm that Certificate updated, click Close;
- Click on Test Connection and confirm the connectivity.
- vShield Endpoint upgrade:
- vMotion all VMs to another host(s);
- Deactivate DSVA (Trend Micro Deep Security Virtual Appliance) in TMDS Manager. This will remove A/V protection from any guest that are running on the host, this is the reason we vMotion all VM off in step 1;
- Go to Home > Inventory > Host and Clusters, highlight host, click on vShield tab, General tab. Click Update;

- Click Install;

- Wait for the update to finish (you may need to click Refresh) and confirm it has been upgraded:

- Reactivate DSVA (Trend Micro Deep Security Virtual Appliance) in TMDS Manager.
All DSVAs did not report any problems and virtual machines got protected as soon as they were vmotioned back to the upgraded host.
I also checked that Endpoint configuration did not have duplicated values.
Hope this will help to keep your TM DS implementation healthy…
These instructions are for Cisco UCS B200 M2 blade server firmware upgrade from 2.0(1q) to 2.0(3a) (Vblock support matrix 2.5.9).
- Before you start downloading firmware and upgrading UCS Manager and the blades, it may be a good idea to go through some housekeeping:
- Login to UCS Manager. Verify overall status of Fabric Interconnects, I/O Modules, Servers and Adapters;
- Navigate to Admin tab, Faults, Events and Audit Log. Make sure there are no alerts or if they can be safely ignored;
- Equipment tab, Fabric Interconnects, Fabric Interconnect A/B. Make sure you have enough space on bootflash;

- Backup your current configuration. Admin tab, All node, select Backup Configuration, Create Backup Operation. Make sure you specify the file name and extension, Click OK

- Download firmware upgrade bundles from Cisco website
Downloads Home > Products > Unified Computing and Servers > Cisco UCS Infrastructure and UCS Manager Software:
- UCS Infrastructure bundle – ucs-k9-bundle-infra.2.0.3a.A.bin
- UCS B-Series blade server products bundle – ucs-k9-bundle-b-series.2.0.3a.B.bin
- If you have any C-Series servers managed by UCS Manager then also download Software for the UCS C-Series rack-mount servers. ucs-k9-bundle-c-series.2.0.3a.C.bin

- Upload firmware upgrade bundles to Fabric Interconnects.
If you have two Fabric Interconnects configured as a cluster, the firmware upgrade bundles will be uploaded to both FIs. It does not matter which FI, primary or subordinate, you are connected to. Even if one FI is down, you still can upload firmware upgrades to the active FI. Software and configuration will be re-synced when FI comes back online.
- Equipment tab, Equipment node, in the work pane select Installed Firmware, Download Firmware, Browse to the files you downloaded from Cisco in step 2 and upload firmware upgrade bundles to Fabric Interconnects. If you run out of space, delete old/unused software bundles. Click on Packages tab and confirm software bundles have been uploaded

- UCS B-Series blade server products bundle (ucs-k9-bundle-b-series.2.0.3a.B.bin) contains server BIOS, CIMC and adapter firmware upgrades. In the final step (4.12) we will be upgrading server BIOS and therefore need to know what version is included in the software bundle we have just uploaded. In this example I will be upgrading Cisco UCS B200 M2 server BIOS. The BIOS version is S5500.2.0.3.0.050720121819.bin

- Follow these steps to upgrade UCS Manager, Fabric Interconnects, I/O Modules, server BIOS, CIMC, Adapters and Controllers:
Some of these steps take long time to complete. Please don’t panic, let UCS Manager do its job!!!
- Disable Call Home.
Navigate to Admin tab, All node, Communication Management, Call Home. In the work pane change State to Off, click on Save Changes;
- Update Adapters, CIMC and I/O Modules.
When you update firmware is just loads new version to Backup Version slot. The new version will be activated when you restart components.
Navigate to Equipment, Equipment node. In the Work pane click Firmware Management, Installed Firmware. Select specific Servers / Chassis you would like update components on or select UCS Manager to update components in all servers managed by this UCS Manager
- Update Adapter firmware:
Click Update Firmware, Select Adapters from the Filter: drop-down menu, Select (o) Bundle, Set Bundle to the version you want to upgrade to and click OK.

- Update CIMC:
Click Update Firmware, Select CIMC Controller from the Filter: drop-down menu, Select (o) Bundle, Set Bundle to the version you want to upgrade to and click OK.

- Update I/O Modules
Click Update Firmware, Select IO Modules from the Filter: drop-down menu, Select (o) Bundle, Set Bundle to the version you want to upgrade to and click OK.

- Activate adapters — Choose Ignore Compatibility Check and Set Startup Version Only when performing this step
Click Activate Firmware, Select Adapters from the Filter: drop-down menu, Select (o) Bundle, Set Bundle to the version you want to upgrade to and click OK.

Activation Status will change to Pending Next Boot
- Activate CIMC — Choose Ignore Compatibility Check when performing this step
Click Activate Firmware, Select CIMC Controller from the Filter: drop-down menu, Select (o) Bundle, Set Bundle to the version you want to upgrade to and click OK.
CIMC firmware will be upgraded, CIMC controllers restarted, all active CIMC sessions will be disconnected.

- Activate Cisco UCS Manager — Choose Ignore Compatibility Check when performing this step
Click Activate Firmware, Select UCS Manager from the Filter: drop-down menu, Select (o) Bundle, Set Bundle to the version you want to upgrade to, select ICC and click OK.
Confirm to ignore compatibility check.

You will loose connection to UCS Manager. Please log back in.
- Activate I/O modules — Choose Ignore Compatibility Check and Set Startup Version Only when performing this step

Activation Status will change to Pending Next Boot
- Activate subordinate fabric interconnect — Choose Ignore Compatibility Check when performing this step.
All I/O Modules in the data path of this Fabric Interconnect will be restarted and firmware upgraded (see step 6). You need to make sure your blades are configured for data path redundancy, otherwise you will experience downtime on blades.

Fabric Interconnect firmware upgrade is quite long process, be patient. Wait for Fabric Interconnect to get back online and make sure that it is Ready and Status is Up:

- Manually failover the primary fabric interconnect to the fabric interconnect that has already been upgraded
DC1-FIC01-A# show cluster state
Cluster Id: 0xbf9b6f54f8c411e0-0x9dac547fee135684

A: UP, PRIMARY
B: UP, SUBORDINATE

HA READY
DC1-FIC01-A# connect local-mgmt
Cisco Nexus Operating System (NX-OS) Software
(--+-- Skipped --+--)
DC1-FIC01-A(local-mgmt)# cluster lead b
Cluster Id: 0xbf9b6f54f8c411e0-0x9dac547fee135684
DC1-FIC01-A(local-mgmt)#
You will loose connection to UCS Manager, Log back in again
- Verify that the data path has been restored
- Activate primary fabric interconnect — Choose Ignore Compatibility Check when performing this step.
All I/O Modules in the data path of this Fabric Interconnect will be restarted and firmware upgraded (see step 6). You need to make sure your blades are configured for data path redundancy, otherwise you will experience downtime on blades.

Fabric Interconnect firmware upgrade is quite long process, be patience. Wait for Fabric Interconnect to get back online and make sure that it is Ready and Status is Up:

- I like to keep Fabric Interconnect A as Primary.
DC1-FIC01-B# show cluster state
Cluster Id: 0xbf9b6f54f8c411e0-0x9dac547fee135684

B: UP, PRIMARY
A: UP, SUBORDINATE

HA READY
DC1-FIC01-B# connect local-mgmt
Cisco Nexus Operating System (NX-OS) Software
(--+-- Skipped --+--)

DC1-FIC01-B(local-mgmt)# cluster lead a
Cluster Id: 0xbf9b6f54f8c411e0-0x9dac547fee135684
DC1-FIC01-B(local-mgmt)#
Log back in again…
- Update host firmware package(s) for servers — Must be the last firmware upgraded.
Host firmware package will include firmware upgrade for BIOS, Storage Controller and Adapters. You can amend existing Host Firmware Package to include new firmware versions or create a new one. New Host firmware package will need to be associated with the Server Service Profile(s). Before you amend Host Profile Package to include new firmware or associate a new Host Profile Package with a Service Profile, make sure you check and understand how these changes will affect physical servers. Make sure you have management policy setup correctly. Open Servers tab, Policies node, Maintenance Policies.

Immediately – the server will be rebooted immediately after you amend Host Profile Package already associated with Service Profile;
User Ack – User will need to acknowledge server reboot in Pending Activities. The interesting part is that even if user reboots the server manually, the changes will not be activated, you need to acknowledge the changes in Pending Activities.
Timer Automatic– Automatic reboot during scheduled maintenance window(s)
- Create a new Host Profile Package: Navigate to Servers tab, Policies, Host Profile Packages. Right click on Host Profile Packages, select Create Host Firmware Package
- Select BIOS version you made a note of in the step 3.2, click OK

- Assign newly created Host Profile Package to a Service Profile: Navigate to Servers tab, Service Profiles, select Service Profile assigned to server(s) you would like to upgrade. In the Work pane click on Policies tab and expand Firmware Policies, select Host Profile Package and click Save Changes. Depending on the Maintenance Policy configured, the server will be rebooted immediately or you will need to acknowledge reboot when you ready.

- Enable Call Home.
Navigate to Admin tab, All node, Communication Management, Call Home. In the work pane change State to On, click on Save Changes.
Hope this will help.
- Deploy UIM/P from OVF template;
- Verify the UIM/P services are running properly;
uim001:~ # service uim-service-wrapper status
uim-service-wrapper is running
- Enable JBoss JMX Console access:
uim001:~ # cd /opt/ionix-uim/tools
uim001:/opt/ionix-uim/tools # perl password-change.pl
+========================================================+
| Password Update Utility                                |
+========================================================+
| Available Commands:                                    |
|     [A]uto-Generate All Passwords                      |
|     [C]hange Single Password                           |
|     [S]ychronize from App Server                       |
|     [R]eset the 'sysadmin' account                     |
|     [Q]uit                                             |
+========================================================+
Command: c
+========================================================+
| List of Users                                          |
+--------------------------------------------------------+
| 1. system                                              |
| 2. controlDaemon                                       |
| 3. int_mod_user                                        |
| 4. homebase.admin                                      |
| 5. smi.admin                                           |
| 6. uimadaptadmin                                       |
| 7. internal                                            |
| 8. msa_user                                            |
| 9. jmx-user                                            |
+========================================================+
User (1-9): 9
New Password: type_new_password
The password for the 'jmx-user' account was successfully updated.
- Import VMware ESX/ESXi media (see HOW TO: Add new VMware vSphere ISO image to UIM/P)
- Source the profile to setup your environment and perform administrative tasks at the command line interface
uim001:/ # . /etc/voyence.conf
uim001:/ #
- Enable Security Assertion Markup Language (SAML) authentication
uim001:/ # cd /opt/ionix-uim/tools
uim001:/opt/ionix-uim/tools # perl enableSaml.pl
Script will create a SAML authenticated system administrator account and set the SAML enabled property to true
JBOSS_HOME=/opt/ionix-uim/jboss
JAVA_HOME=/usr/java/latest
Created 'samlsysadmin' user.
- Import CA-signed SSL certificate:
- Login to UIM/P as root;
- Generate a Private Key and Certificate Signing Request (CSR). NB that y default certificates are tied to the exact server name they are created for. Which is normally the FQDN of the server. If you create a certificate for the server uim001.vstrong.info and then connect by the short name uim001 / UIM001 or by any other DNS aliases, the certificate will not be seen as a trusted certificate. There is a way to get all aliases included in the certificate. Please refer to “HOW TO: Create server certificate and include DNS alias“. If you are going this route, please ignore this step.
uim001:~ # cd /opt/ionix-uim/tools/ssl
uim001:/opt/ionix-uim/tools/ssl # perl ssl-utility.pl -keygen

===============================================================================
SSL Configuration Utility
-------------------------------------------------------------------------------

This utility will generate a private key and a Certificate Signing
Request (CSR).  Note: Do not issue a private key challenge password
during the prompts to follow.  The password will be added during the
install mode.  Would you like to continue? [y/n]
y

Required certificate information:
Country Name (2 letter code): UK
State or Province Name (full name): London
Locality Name (eg, city): London
Organization Name (eg, company): vStrong.info
Organizational Unit Name (eg, section):
Server hostname: uim001.vStrong.info
Generating Private Key and CSR...
Generating a 1024 bit RSA private key
...............++++++
.......++++++
writing new private key to 'server.key'
-----
You are about to be asked to enter information that will be incorporated
into your certificate request.
What you are about to enter is what is called a Distinguished Name or a DN.
There are quite a few fields but you can leave some blank
For some fields there will be a default value,
If you enter '.', the field will be left blank.
-----
Country Name (2 letter code) [AU]:State or Province Name (full name) [Some-State]:Locality Name (eg, city) []:Organization Name (eg, company) [Internet Widgits Pty Ltd]:Organizational Unit Name (eg, section) []:Common Name (eg, YOUR name) []:Email Address []:
Please enter the following 'extra' attributes
to be sent with your certificate request
A challenge password []:An optional company name []:
Private Key created: /opt/ionix-uim/tools/ssl/server.key
Certificate Signing Request created: /opt/ionix-uim/tools/ssl/server.csr

Please send the CSR to your preferred Certificate Authority (CA).  They will
send you a certificate.  Save this certifcate to this server, and then run
this utility in the "install" mode.
The utility generates the following files:
– server.key – which is the private key
– server.csr – which is the certificate signing request (CSR)
Download server.csr file to your PC and send it to your Certificate Authority (CA)
- Receive signed certificate from CA, upload it to ‘/opt/ionix-uim/tools/ssl‘ folder
- Install private key and certificate
Run perl ssl-utility.pl –install <private key file> <certificate file>
You will be prompted for a password to protect the private key and certificate.
All the product services will also be restarted
uim001:/opt/ionix-uim/tools/ssl # perl ssl-utility.pl -install server.key certnew.cer
===============================================================================
SSL Configuration Utility
-------------------------------------------------------------------------------

This utility will install the private key and certificate into
httpd, Tomcat, and JBoss's configurations.  The original certificate,
key, and keystore will be backed up into the /opt/ionix-uim/backup
directory.   Would you like to continue? [y/n]
y

Please create a password for the keystore:
SecretPWD

Stopping uim-service-wrapper service

Converting base64 encoded certificate to DER format...
Converting base64 encoded private key to DER format...

Injecting DER certificate and DER private key into the keystore...
Using keystore-file : temp/voyence-ssl.keystore
One certificate, no chain.
Key and certificate stored.
Alias:voyence-server  Password:
Applying password to keystore...
Using the Common Name from the certificate: uim001.vstrong.info

Installing Apache certificate...
copying /opt/ionix-uim/conf/server.crt to /opt/ionix-uim/backup/server.crt

Installing Apache private key...
copying /opt/ionix-uim/conf/server.key to /opt/ionix-uim/backup/server.key

Installing JBoss keystore...
copying /opt/ionix-uim/jboss/server/vc-server/deploy/1vc.sar/voyence-ssl.keystore to /opt/ionix-uim/backup/voyence-ssl.keystore
Installing SLM Tomcat keystore...
copying /opt/ionix-uim/slm/conf/.keystore to /opt/ionix-uim/backup/.keystore
Installing HomeBase keystore...
copying /opt/ionix-uim/bmp/keys/ssl.keystore to /opt/ionix-uim/backup/ssl.keystore.1
Starting service uim-service-wrapper

SSL Configuration is complete.
- Install UCS Manager certificateUPDATE: If you installing EMC Ionix UIM/P 3.2 and later, please skip steps 8.1 to 8.3, these steps for UIM/P 3.1.*.
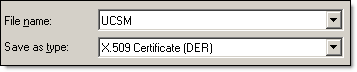
- Export UCS Manager certificate to DER encoded binary X.509 (.CER) format
- Export from the web browser, rename to *.cer:
OR
- In UCS Manager open Admin tab, Filter – All, Key Management, KeyRing default. Open Certificate, highlight the certificate and save it to a text file as *.cer
- Upload .CER file to /opt/ionix-uim/conf/CA
- Convert .CER file to .CRT file:
openssl x509 -inform DER -in UCSM.cer -out UCSM.crt
- Install UCS Manager certificate in UIM/P
- UIM/P 3.1:
uim001:/opt/ionix-uim/conf/CA # openssl x509 -inform DER -in UCSM.cer -out UCSM.crt
uim001:/opt/ionix-uim/conf/CA # ./cert_hash.pl
Installing:UCSM.crt....
Installing:voyenceca.crt....
- UIM/P 3.2:
vim001:/opt/ionix-uim/tools/ssl # cd /opt/ionix-uim/tools
vim001:/opt/ionix-uim/tools # ./importUcsCertificate.pl
UCS IP Address: 192.168.100.30

Retrieving certificate from 192.168.100.30

Certificate details for 192.168.100.30:
--------------------------------------------------------------------------------
Certificate:
Data:
Version: 3 (0x2)
Serial Number:
f5:18:24:1a:bb:f2:af:94
Signature Algorithm: sha1WithRSAEncryption
Issuer: CN=UCSM001
Validity
Not Before: Dec  5 14:38:42 2012 GMT
Not After : Dec  5 14:38:42 2013 GMT
Subject: CN=UCSM001
Subject Public Key Info:
<CERTIFICATE DETAILS>
--------------------------------------------------------------------------------
Would you like to import this certificate into UIM/P? [y/n] y
Importing the certificate into UIM/P

Installing:importedCertificate-144141.crt....
Installing:voyenceca.crt....

You must now restart device services to reload the certificate cache.
Please make sure there are no provisioning or other tasks running and
then issue this command:
service uim-device-services restart
- Restart UIM services
You must now restart device services to reload the certificate cache.
Please make sure there are no provisioning or other tasks running and
then issue this command:
service uim-device-services restart

uim001:/opt/ionix-uim/conf/CA # service uim-device-services restart
Stopping uim-device-services
done
Starting uim-device-services
Device Master Service started
Device Service started
done
- If you desire, you can change UIM/P default sysadmin password (it is ‘sysadmin’ BTW)
- Login to UIM/P web interface and click on UIM Configuration Center icon in the right top corner

- Under Online User Guide click on Change Password and click OK

- OK, UIM/P is installed and configured.
Please proceed to HOW TO: Add/Discover Vblock in EMC UIM/P post.
The default debug log level in Trend Micro DSVA is 5. To check current debug log level run this command:
grep LOG_EMERG /var/log/syslog
If DSVA was restarted recently and debug level has not been reconfigured since last reboot, you will not get any LOG_EMERG results. The only way to check current debug log level is to change it up or down and then run grep command again.
To increase or decrease debug logs execute the following commands via ssh or the console:
- To increase debug logs:
killall –USR1 ds_am (increments +1, up to level 8)
- To decrease debug logs:
killall –USR2 ds_am (decrements -1, down to level 0)
root@DSVA001:~# grep LOG_EMERG /var/log/syslog
 root@DSVA001:~# killall -USR1 ds_am
 root@DSVA001:~#
 Message from syslogd@DSVA001 at Oct 11 11:05:51 ...
  vmpd[19896]: [LOG_EMERG][main.cpp:555] debug_level changed: 5->6

root@DSVA001:~# grep LOG_EMERG /var/log/syslog
 Oct 11 11:05:51 DSVA001 vmpd[19896]: [LOG_EMERG][main.cpp:555] debug_level changed: 5->6

root@DSVA001:~# killall -USR2 ds_am
 root@DSVA001:~#
 Message from syslogd@DSVA001 at Oct 11 11:06:05 ...
  vmpd[19896]: [LOG_EMERG][main.cpp:562] debug_level changed: 6->5

root@DSVA001:~# grep LOG_EMERG /var/log/syslog
 Oct 11 11:05:51 DSVA001 vmpd[19896]: [LOG_EMERG][main.cpp:555] debug_level changed: 5->6
Oct 11 11:06:05 DSVA001 vmpd[19896]: [LOG_EMERG][main.cpp:562] debug_level changed: 6->5
Trend Micro recommends increasing debug level to 6 to allow for more debugging. Reset the debug level to 5 for normal operations.
To enable SSH on Deep Security Virtual Appliance (DSVA)
root@DSVA001:~# ssh-server start
Starting Dropbear SSH server: dropbear
root@DSVA-pdc1vex001:~# ssh-server status
ssh running
If you would like ssh service to start with DSVA please follow these instructions: Enabling persistent SSH service on Deep Security Virtual Appliance (DSVA)
These instructions have been performed on EMC VNXe 3100 but should also be applicable to EMC VNXe 3150 and 3300.
- Login to VNXe Unisphere;
- Settings > More Configuration… > Update Software;

- Click on Obtain Candidate Version Online, you will be redirected to EMC Online Support website where you can download VNXe Operating Environment firmware file to your PC (we will be using MR3 SP1 – 2.3.1.19462);
The file extension is .gpg
https://support.emc.com/downloads/8864_VNXe-Series;
- Click on Upload Candidate Version, browse for .gpg file you downloaded from EMC, click on Upload;
- After upload has finished you will see current and candidate software version:

- Before you proceed with the upgrade, please run the Health Check. Click on Perform Health Check, click on Run;

- Make sure Health Check completed successfully

Click Close;
- Click on Install Candidate Versionto update VNXe software.
- For VNXe arrays with a single Storage Processor (SP) software upgrade is disruptive. Make sure all servers connected to the array have committed the I/O routines and then perform software upgrade;
- For VNXe arrays with a dual Storage Processor (SP) software upgrade is NON disruptive.
- Click Install. VNXe performs a health check to ensure that the update can occur. If the pre-update health check fails, you need to resolve the problem before performing the installation.

Click Install;
- After VNXe has finished installing the update, click Close.

- Re-open Unisphere and go through Post-Upgrade Configuration Wizard where you configure some setting which were not available in previous software version.
Update Disk firmware
The manual provides the following instructions how to upgrade disk firmware on VNXe array:
- Click Settings > More configuration > Update Software;
- Click the Disk Firmware tab.
- Click Obtain Disk Firmware Online. This link takes you to the EMC Online Support website where you can download a disk firmware file to your local system.
- Click Install Disk Firmware. A browse box opens.
- Click Browse and select the disk firmware file that you downloaded from EMC Online Support website.
- Click Upload. The disk firmware is uploaded to the VNXe storage system and installed on the system.
I could not find any disk firmware upgrade packages for VNXe on EMC web site and logged a Service Request with EMC support. They confirmed that currently (October 2012) there is no disk firmware package available for VNXe disk firmware upgrade and they could not tell me when it is going to be available. They also confirmed that VNXe software upgrade does not contain any firmware upgrades for the disks.
Please refer to the following web site for EMC VNXe Series documentation, downloads and advisories:
http://www.emc.com/vnxesupport
These instructions are for Cisco UCS C200 M2 standalone server firmware upgrade from 1.4(2) to 1.4(3c)2 (Vblock support matrix 2.5.9). The procedure for other Cisco UCS server models and UCS-managed servers might be different.
- Download server firmware from Cisco Support website;
- Download Home >; Products >; Unified Computing and Servers >; Cisco UCS C-Series Rack-Mount Standalone Server Software
- Click on Cisco UCS C200 M2, download Unified Computing System (UCS) Server Firmware
Cisco UCS Host Upgrade Utility – ucs-c200-huu-1.4.3c.2.iso
You will need to login to Cisco Support with your Cisco ID

- Exctract CIMC firmware upgrade from the ISO image that you downloaded from Cisco;
upd-pkg-c200-m1-cimc.full.1.4.3c.bin

- There is no need to shut the server down – CIMC firmware upgrade is non intrusive;
Login to CIMC, for details on default login and password please refer to Default Passwords page

- Click on Admin tab, Firmware Management;
Current CIMC Firmware version

- Click on Install CIMC Firmware through Browser Client, Browse to CIMC firmware update .bin file;

- Click Install Firmware. New firmware will be downloaded to CIMC and installed as a Backup Version;


- Click ‘Activate CIMC Firmware‘. Read the Warning that the management controller will be rebooted IMMEDIATELY to complete the activation

Click ‘Activate Firmware’;
- CIMC firmware activation will take several minutes. You will be redirected to the login screen. Make a note that CIMC Version is 1.4(3c);

- At this point of time you MUST shutdown the server OS;
- Login to CIMC and check the Server Status;
- Click ‘Launch KVM Console‘ in the Actions area on the Server tab;
- When KVM Console launches (don’t we all love Java?):
- click on VM (Virtual Media) tab, Add Image, browse to the ISO image we downloaded from Cisco in step 1.2 and click on Mapped check box next to it

- Go back to CIMC management web interface and Power On Server in the Actions area on the Server tab, click OK to confirm
- Make sure your server boots from CD (Virtual CD you mapped to the ISO image). Press F6 to invoke Boot Menu, select ‘Cisco Virtual CD/DVD’

- Respond to the ‘Have you read Cisco EULA?’ message by pressing Y;
- C-Series Host Upgrade Utility will start. You will be presented with the list of devices you can update firmware on:

- As you can see, you can update CIMC through Host Upgrade Utility as well as doing it manually as described above. Personally, I prefer to update CIMC manually in order to have the best possible experience with the Java KVM Console
- Enter 2 to update BIOS, wait for the update to finish, press any key to get back to the menu
- Enter 3 to update LOM (if needed)
- Enter 4 to update LSI controller firmware
- Enter 10 to Reboot, retaining current CIMC settings
- Close KVM Console, this will also disconnect any Virtual Media you mapped;
- Your server will be powered on automatically.
Done.
These instructions are valid for EMC Unified Infrastructure Manager / Provisioning (UIM/P) v3.0, Build 3.0.0.0.530.
UPDATE: EMC UIM/P 4.1 introduced support for Linux installation. Please refer to Add/Remove ISO images in EMC UIM/P 4.1 for details of the updated procedure.
When you try to create a New Service Offering you will only be able to choose Operating Systems which were added to UIM/P at the time Vblock was built.

If you have a couple of spare blades you were planning to use for Bare Metal OS install or you just want to create a new cluster and play with new VMware vSphere 5.1, you need to add new ISO image.
Here is the instructions how to do it:
- Using WinSCP or similar application, upload new VMware vSphere ISO image to the EMC UIM Manager virtual appliance /tmp folder:

- SSH to UIM VA with PuTTY and login as root (the password will be different to sysadmin, please refer to your Vblock handout for details)
Import new VMware vSphere ISO image:
/opt/ionix-uim/tools/uim_loadesx.sh -i /tmp/NEW_VMware_vSphere_image.iso

This is how it should like:
 vim001:~ # /opt/ionix-uim/tools/uim_loadesx.sh -i /tmp/VMware-VMvisor-Installer-5.1.0-799733.x86_64.iso
 =====================================
 uim_loadesx.sh
 version: 2.0
 =====================================
 ==> Importing ISO media
 HomeBase Server 6.6

Scanning paths...
 You have chosen to upload 300.6 MB of packages using this operating system:

Note: OS information is rarely complete within the packages so it is
       recommended to fill in all applicable details for maximum accuracy

Linux distributions in particular need the real os name specified
       to ensure proper function of package matching

Server 6.6.0

Uploading: esxi-5.1.0-799733-x86_64-5.1.0-esxi-5.1.0-x86_64.disc (300.6 MB)

Successes: 1
 Duplicates: 0
 Failures: 0

Completed in 37.6 secs
 -------------------------------------
 Done
- Now, if you try to create a New Service Offering, new Vmware vSphere image is available:

- Download VMware ESXi Driver for Cisco fnic and Cisco enic:
- Extract “Offline Bundles” files from the ZIP archives:
Cisco enic:
enic_driver_2.1.2.22-564611.zip --> enic_driver_2.1.2.22-offline_bundle-564611.zip
enic_driver_2.1.2.38-1023014.zip --> enic_driver_2.1.2.38-offline_bundle-1023014.zip
Cisco fnic:
fnic_driver_1.5.0.8-758653.zip --> fnic_driver_1.5.0.8-offline_bundle-758653.zip
fnic_driver_1.5.0.20-1021375.zip --> fnic_driver_1.5.0.20-offline_bundle-1021375.zip
- Connect to vCenter Server, navigate to Home >> Solutions and Application >> Update Manager
- Open Patch Repository tab and click on Import Patches:
- Browse for the ‘offline bundle’ file (.ZIP), click Next;
- Upload offline bundle’ file to vCenter Update Manager;
- Click Finish to confirm import.

- You can now add this patch to an existing Baseline or create a new one.
I hope this will help.
Small collection of VMware PowerCLI / Powershell scripts and onliners to save time re-typing them:
- Get a list of all virtual machines with snapshots and save it to a csv file;
#
Get-VM | Get-Snapshot | Select-Object VM, Name, SizeMB, Created, Description | Export-Csv c:snapshots.csv
#
- Get a list of virtual machines, guest IP address, Datacenter, Cluster and Datastore they are running on;
#
Get-VM | select @{ Name = "Datacenter"; Expression = {Get-Datacenter -VM $_ }},`
                @{ Name = "Cluster"; Expression = {Get-Cluster -VM $_ }},`
                Name,`
                @{ Name = "IPAddress"; Expression = { $_.Guest.IPAddress }},`
                NumCPU, MemoryMb, ResourcePool, ProvisionedSpaceGB, UsedSpaceGB,`
                @{ Name = "Datastore"; Expression = {Get-Datastore -VM $_ }},`
                PowerState, Notes | Sort Name`
                | Export-Csv "c:DC1.csv"
#
- Change Port Group on multiple VMs;
 $OldPortGroup = 'OLD_PG'
 $NewPortGroup = 'New_PG'
 Get-VM | Get-NetworkAdapter | where {$_.NetworkName -eq $OldPortGroup} | Set-NetworkAdapter -NetworkName $NewPortGroup -Confirm:$false
- Enter/Exit Maintenance Mode;
To enter Maintenance Mode, at the ESX console type:
vim-cmd /hostsvc/maintenance_mode_enter
To exit Maintenance Mode type:
vim-cmd /hostsvc/maintenance_mode_exit
- Get a list of all virtual machines with a specific vNIC type, export to csv file;
where {$_.Type -eq 'Vmxnet3'} – all VMs with VMXNET3 network adapter type
where {$_.Type -eq 'e1000'} – all VMs with Intel E1000 network adapter type
where {$_.Type -eq 'Flexible'} – all VMs with AMD 79C970 PCnet32 – LANCE NIC network adapter type
where {$_.Type -ne 'Vmxnet3'} – any nic but VMXNET3
#
Get-VM | Get-NetworkAdapter | where {$_.Type -eq 'Vmxnet3'} | foreach ($_) {Write-Host $_.parent.name, $_.Name, $_.Type}
OR
Get-VM | Get-NetworkAdapter | where {$_.Type -eq 'Vmxnet3'} | Select @{N="VM";E={$_.parent.name}}, Name, Type | Export-Csv -Path c:nic.csv
#
- Find virtual machines with disks that need consolidation;
Find VMs:
Get-VM | where {$_.ExtensionData.Runtime.consolidationNeeded} | Select Name
Find VMs and consolidate all:
Get-VM | where {$_.ExtensionData.Runtime.consolidationNeeded} | %{$_.consolidatevmdisks_task()}
#
- List vmnic and vmkernel MAC addresses of the host;
Get-VMHostNetworkAdapter | Select @{Name = "ESXi"; Expression = {$_.VMHost.Name}}, Name, Mac
ESXi                         Name           Mac
----                         ----           ---
host1.vstrong.info           vmnic0         00:25:b5:01:01:07
host1.vstrong.info           vmnic1         00:25:b5:01:01:06
host1.vstrong.info           vmk0           00:25:b5:01:01:07
host1.vstrong.info           vmk1           00:50:56:71:1d:b9
host1.vstrong.info           vmk2           00:50:56:7c:2a:d6
- Stay tuned…
|
Subscribe to Blog via Email
Join 169 other subscribers
|
Recent Comments