|
|
Quick Powershell script to add DHCP reservation for a VM on multiple DHCP servers:
Please refer to DHCP Server Cmdlets in Windows PowerShell for more details.
$DHCPservers = 'DHCP001', 'DHCP002'
$Scope = '10.80.24.0'
$IPaddress = '10.80.24.12'
$Server = 'SQL001'
$Domain = 'internal.vStrong.info'

$VM = Get-VM $Server

# $VM.NetworkAdapters.MacAddress returns MAC address in semicolon separated 00:50:56:00:00:00 format.
# Add-DhcpServerv4Reservation only accepts MAC address in either flat 005056000000 or dash separated 00-50-56-00-00-00 format.
$MACaddress = $VM.NetworkAdapters.MacAddress.Replace(":","")

# If the Guest OS computer name is not available, the FQDN will be built based on the VM name and the domain name.
If ($VM.Guest.HostName -ne $null) {
$GuestName = $VM.Guest.HostName
}
else {$GuestName = $VM.Name+"."+$Domain}

foreach ($DHCPserver in $DHCPservers) {
Add-DhcpServerv4Reservation -ComputerName $DHCPserver -ScopeId $Scope -IPAddress $IPaddress -ClientId $MACaddress -Name $GuestName -Type DHCP -Confirm:$false
}
Hope this will help.
If you are using EMC UIM/P 4.1, 4.1 Patch 1 or Patch 2 and your UIM/P is not connected to the Internet you may have an issue with starting Configuration Center.
It starts to load the client but then crash with the following error:
“An unexpected problem has occurred. Please contact EMC Customer Support”
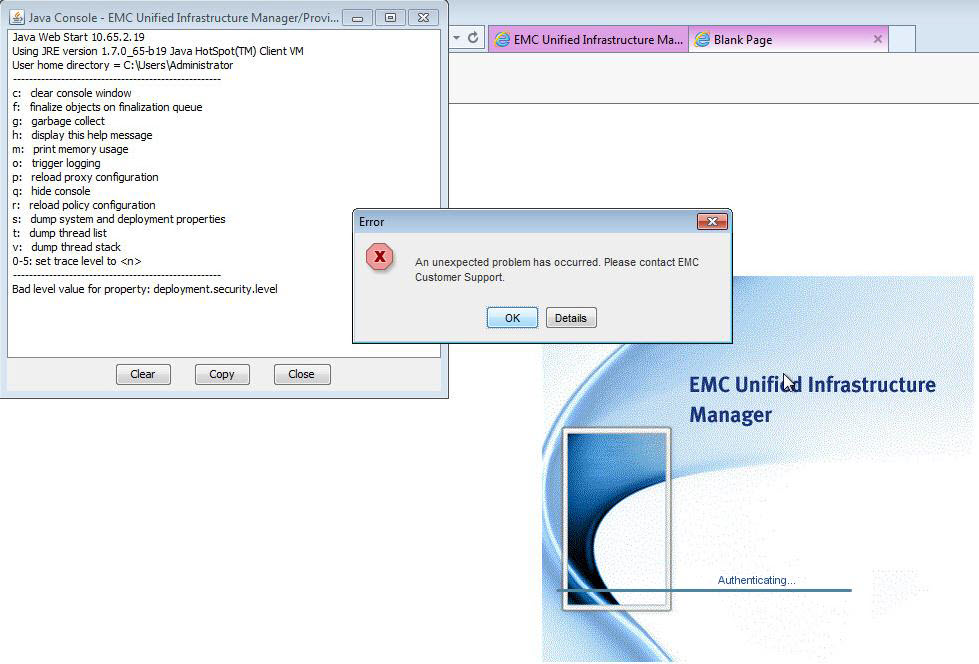
And when you click on details you have lovely java error, meaningful as always (yes, Sheldon, it’s sarcasm…):
java.lang.NullPointerException

at com.powerup.service.ServiceLocator.getDomainService(ServiceLocator.java:217)

at com.powerup.common.ServiceFactory.getDomainService(ServiceFactory.java:212)

at com.powerup.common.ServiceFactory.loginWithToken(ServiceFactory.java:100)

at com.powerup.configmgr.client.app.login.cmds.SilentLoginCmd.performLogin(SilentLoginCmd.java:15)

at com.powerup.configmgr.client.app.login.cmds.LoginCmd.execute(LoginCmd.java:50)

at com.powerup.configmgr.client.mvc.ClientEvent.execute(ClientEvent.java:196)

at com.powerup.configmgr.client.mvc.ClientEvent.executeCmds(ClientEvent.java:184)

at com.powerup.configmgr.client.mvc.awt.ClientController.processClientEvent(ClientController.java:391)

at com.powerup.configmgr.client.mvc.swing.JClientController.processClientEvent(JClientController.java:212)

at com.powerup.configmgr.client.mvc.swing.JClientController$WeakSwingWorker.construct(JClientController.java:135)

at com.powerup.configmgr.client.mvc.swing.SwingWorker.run(SwingWorker.java:249)

at java.lang.Thread.run(Unknown Source)
Are you trying to blame UIM/P again? Surprise, surprise, you are right!
It’s is UIM/P bug and the engineering team have written a fix for it, so if you have this issue please log a call with VCE Support and refer to this post and we can help you.
I’m sure it will be permanently fixed in the next UIM/P release.
(c) Zbigniew ‘Ziggy’ Misiak
UPDATE
EMC released Knowledge Base article to address this issue:
Impact: Unable to launch Configuration Center from the UIM/P web interface
Issue: This is caused by a client side issue with a third party component. There is a Spring Framework schema version mismatch in the ext-VoyenceControl.jar. The NullPointerException error will only occur if the client machine does not have access to the internet.
Environment:
– Unified Infrastructure Manager/Provisioning 4.1.0.0
– Unified Infrastructure Manager/Provisioning 4.1.0.1
– Unified Infrastructure Manager/Provisioning 4.1.0.2
Cause: The org.springframework package is not available where the application is attempting to access the correct schema file.
Resolution: To resolve the issue, use WinSCP or other third-party tool to transfer the update-cc-client.zip file to the UIM/P server. Unzip update-cc-client.zip and run the “./update_cc_client” script. Services do not need to be restarted after the update has been applied. After the script has successfully completed Configuration Center should launch successfully.
Direct link to file: https://download.emc.com/downloads/DL54819_UIM/P-Utility-to-correct-Unable-to-Launch-Configuration-Center-(EMC-KB-190752).zip
One of my customers was getting a strange error when trying to remove permissions in vCenter:
The “Remove Permission” operation failed for the entity with following error message. The object or item referred to could not be found.
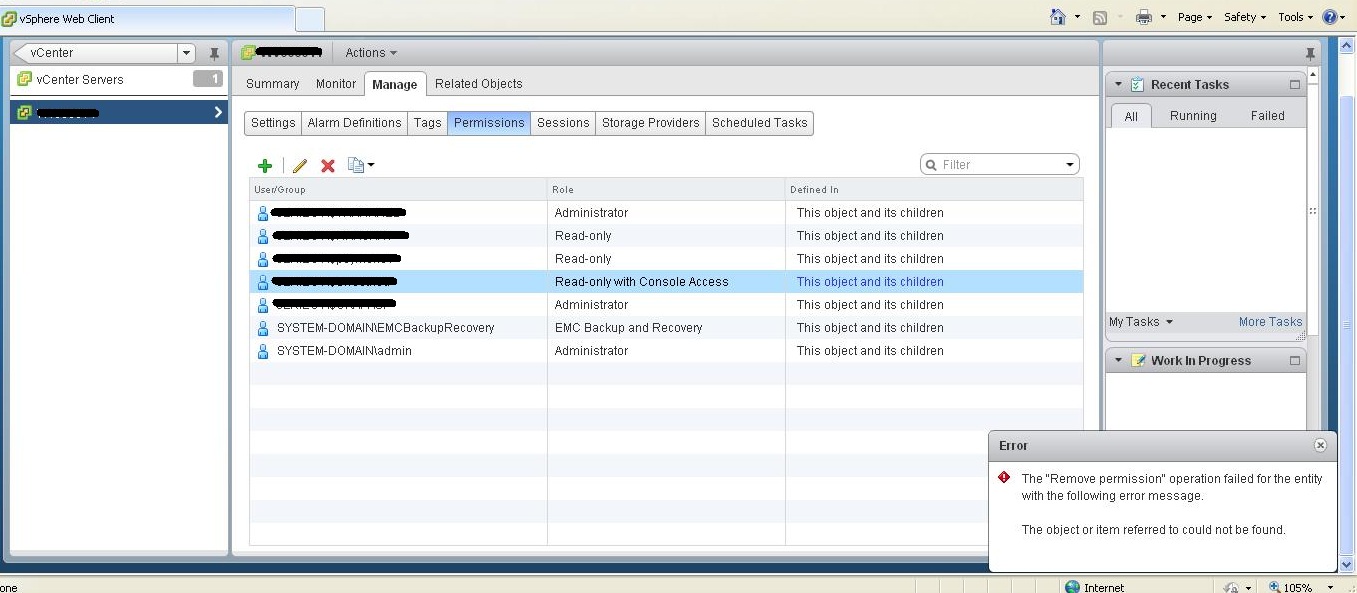
But the user was there! I asked him to add a new user and then remove it. He did that without an issue.
Then he showed me that he can add this user second time… Wait… Second time? What the hell???
So we had 2 entries:
MYLABDANIEL <– new one
and
MYLABdaniel <– old one
Hmm… And when I checked VPX_ACCESS table in vCenter database I had only one user there – the old one…
Here is script to check the table:
SELECT [ID],[PRINCIPAL],[ROLE_ID],[ENTITY_ID],[FLAG]
FROM [mgmtvcenter].[dbo].[VPX_ACCESS]
GO
Remove new user from vCenter – you should be still able to – and then check your user ID
In my case it was:
ID    PRINCIPAL       ROLE_ID  ENTITY_ID   FLAG
502   MYLABdaniel    -1       1           1
So… let’s remove that one… STOP!!! Backup the database first!
We can remove our guy:
DELETE FROM VPX_ACCESS WHERE ID = 502;
Restart vCenter service and that’s it!
(c) Zbigniew ‘Ziggy’ Misiak
I noticed some of the scheduled Malware Scans take too long to complete.

It is not clear how to identify what VMs/Client are still being scanned. You cannot just click on the status bar and get redirected to the corresponding tasks.
Here is what you need to do:
- Navigate to Computers tab;
- Sort computers by Status:

- Go through the list and find Clients/VMs with ‘Scheduled Malware Scan in Progress‘ or ‘Scheduled Malware Scan Pending‘ status:
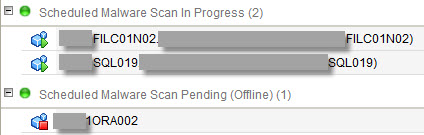
- Right-click on the Client or the whole group of Clients, select Actions and then Cancel Malware Scan.
Hope this will help.
Environment:
- VMware vSphere ESXi 5.5 (VMware ESXi, 5.5.0, Build 1746974)
- Trend Micro Deep Security Manager 9.0 SP1 Patch 3 (Build 9.0.6500)
Prepare ESX operation failed with the “The installation transaction failed” error.
Trend Micro Knowledge Base Solution ID 1102068.
Root Cause:
VMware has confirmed that this issue could happen when downloading and installing the Deep Security Filter Driver, or other vendors’ VIB files, on ESXi 5.5.
This issue does not happen on ESXi 5.1 and older versions, because it is caused by a newly-added logic on ESXi 5.5. This new logic processes multiple partner CRLs in /usr/share/certs/vmparter.crl, but it does not clear the “PEM_R_NO_START_LINE” error in the openSSL error queue. This causes inaccurate communication during VIB payload downloading.
Fix availability:
VMware will include the fix in ESXi 5.5 Update 2.
Recommended Action:
While waiting for the fix from VMware, do the following workaround:
- On the DSM, do the following:
- For Windows: Open the Windows command line and change the directory path to C:Program FilesTrend MicroDeep Security Manager. Execute the following command:
dsm_c -action changesetting -name "settings.configuration.filterDriverNoSigCheck" -value true
dsm_c -action changesetting -name "settings.configuration.filterDriverNoSigCheck" -value true
Stopping Trend Micro Deep Security Manager...
System Setting: settings.configuration.filterDriverNoSigCheck Value: true saved
Starting Trend Micro Deep Security Manager...
Complete
Don’t be fooled by the Complete statement. You may need to manually start the Trend Micro Deep Security Manager service up… :)
- For Linux: Log in via SSH and run the following command:
/opt/dsm/dsm_c -action changesetting -name "settings.configuration.filterDriverNoSigCheck" -value true
The DSM service will stop and start again during the process.
- Go to the DSM console and prepare the ESX again.
The Filter Driver installation should now be successful.
One of the new feature introduced in EMC UIM/P 4.1 is support for Linux installation.
The procedure described in HOW TO: Add new VMware vSphere ISO image to UIM/P article needs to be updated with the following:
uim_loadesx.sh has been replaced with uim_load_os.sh.
uim001:/opt/ionix-uim/tools # ./uim_load_os.sh
Usage: uim_load_os.sh <path to iso image> [-force]
optional, -force if this OS already exists, it will be re-loaded
The procedure is the same for the UIM/P running in OS_Install_Agent mode.
Example:
uim001:/opt/ionix-uim/tools # ./uim_load_os.sh /tmp/ESXi-5.5.0-1746974-standard-vce-4.5.3.iso
Processing OS: esxi-5.5.0-1746974-cust-x86_64
OS was loaded successfully.
Done
To verify new ISO image has been added, open UIM/P management interface, navigate to Asset Discovery, OS Install Agents, highlight UIM and click Enable Connection. New image should appear in the list of available Operating Systems.
You can also remove ISO image from UIM/P:
uim001:/opt/ionix-uim/tools # ./uim_remove_os.sh
Existing packages found:
  1. esxi-5.0.0.u2-914586-cust-x86_64
  2. esxi-5.1.0-1157734-cust-x86_64
  3. esxi-5.5.0-1746974-cust-x86_64
Type OS number or 0 to exit: 0
Exiting.
Hope this will help.
EMC released new version of UIM/P – 4.1 on March 25th 2014 and it’s in VCE RCM’s now.
It contains whole bunch of new cool features:
Support for Asset-Based discovery – UIM/P supports these Converged Hardware System types:
- Vblock 7xx
- Vblock 3xx
- Vblock 2xx
- VSPEX
- Custom
A Converged Hardware System is no longer strictly dependent on hardware. The assets that will comprise each Converged Hardware System need to be planned and configured. You can then use UIM/P to discover the individual compute, storage, and network assets, from which Converged Hardware Systems can then be assembled.
These rules apply:
- A Converged Hardware System can contain multiple compute resources; for example, two UCSMs or eight C-Series blades. Mixing of C-Series and UCS is not allowed.
- Converged Hardware Systems can share arrays, switches, and UCSMs.
- A Converged Hardware System always consists of one storage array, two SAN switches (if applicable), two Ethernet switches (if applicable), and multiple UCSMs or multiple C-series blades.
- This release of UIM/P only supports standalone C-series. It does not support standalone C-series combined with UCSM.
- Storage arrays, switches, and UCSMs can be shared across Converged Hardware Systems. C-series blades cannot be shared.
- If a UCSM is shared across Converged Hardware Systems, blades are allocated to the services on a “first come, first serve” basis.
- When you assemble assets into a Converged Hardware System, UIM/P verifies the combined assets to make sure the physical topology supports it.
- Only compute assets can be added to a Converged Hardware System after initial creation.
- UIM/P presents a choice of isolation zone, based on the isolation zones that are common to the combined assets in each Converged Hardware System.
- A Converged Hardware System with a VMAX and C-Series combination is not currently supported.
Support for Linux OS installation – In addition to ESX and ESXi operating systems, this release of UIM/P enables you to install the following Linux operating systems into blades:
- Red Hat Enterprise Linux
- Cent OS
- Oracle Enterprise Linux
The EMC Unified Infrastructure Manager/Provisioning Support Matrix lists the supported operating systems and versions. If applicable to the operating system, make sure you download the operating system installation media with add-ons. For example, in the case of Red Hat, download the Enterprise version and not the Standard version; otherwise, the add-ons will not be installed.
Support for Automatic storage port selection – By default, UIM/P provides manual storage port selection. With this release, UIM/P also supports automatic storage port selection, whereby UIM/P will select the storage ports to be used by a service.
To enable automatic storage port selection, contact VCE Support.
Support for asset operations and reports – This release of UIM/P allows you to run operations that are specific to the type of asset. You can also run reports on a specific asset that allows you to view asset details and any associated configuration properties.
Asset operations are for expert users that fully understand the operations effect on the configuration. Invoke these operations with extreme caution as they may impact existing services and cause unintended data loss or data unavailability.
Appliance deployment support — ESXi 5.5 – This release supports deployment of the UIM/P appliance on a VMware vCenter™ Server running ESXi 5.5. -4.5.x VCE RCM train supports ESXi 5.5 on Advanced Management Pod.
VMware vCenter Orchestrator 5.5 support – This release of UIM/P supports VMware vCenter Orchestrator 5.5
VSPEX support – EMC UIM/P has received EMC VSPEX certification and is now EMC VSPEX LabsValidated. In addition to supporting VCE Vblock Systems, UIM/P now provides support for the discovery and management of EMC VSPEX.
Support for Multiple UCSs sharing the same storage array – this solution is not a VCE standard currently and will require exception if you need to implement it.
Enhancements and changes to UIM/P performance – This release of UIM/P includes performance optimization for the following functionality:
- Service provisioning
- Service decommissioning
- Synchronizing services with VMware vCenter™
Which feature is coolest for you? Personally my vote goes to Linux OS install!
(c) Zbigniew ‘Ziggy’ Misiak
Recently I worked in the environment where we needed to modify multiple UCS Service Profiles, adding and removing VLANs to/from vNICs.
If you are using vNIC templates – it is just a few clicks and you are done. But what if you don’t? What if you have 20 Service Profiles and each has 10 vNics and you have to add one VLAN and remove the other? And what if you have more???
Yes, you can do all this in UCSM but you will probably die get bored/make mistakes after all those clicks :)
Here is how you do this via CLI/SSH:
fi6120-A# scope service-profile server 3/7          <-- we need to go to our service profile
fi6120-A /org/service-profile # show vnic           <-- we can check our vnic names

vNIC:
 Name Fabric ID Dynamic MAC Addr Virtualization Preference
 ------------------ --------- ------------------ -------------------------
 eth0 A 00:25:B5:A0:00:27 NONE
 eth1 B 00:25:B5:B0:00:27 NONE
fi6120-A /org/service-profile # scope vnic eth0                          <-- we need to go to particular vnic
fi6120-A /org/service-profile/vnic # create eth-if vblock_esx_vmotion    <-- and create vlan
fi6120-A /org/service-profile/vnic/eth-if* # commit-buffer               <-- and commit changes
fi6120-A /org/service-profile/vnic/eth-if # exit                         <-- now if we want to remove it we need to go up 1 level
fi6120-A /org/service-profile/vnic # delete eth-if vblock_esx_vmotion    <-- and we can remove it here
fi6120-A /org/service-profile/vnic* # commit-buffer                      <-- remember to commit changes
fi6120-A /org/service-profile/vnic # exit                                <-- one level up
fi6120-A /org/service-profile # scope vnic eth1                          <-- and we can go to another vnic and repeat everything
fi6120-A /org/service-profile/vnic #
but this still requires to touch all objects and we are lazy need to be more efficient, right? ;)
Powershell to the rescue!
You can download Cisco UCS PowerTool and the documentation from Cisco web site:
https://communities.cisco.com/docs/DOC-37154
Get-Module -ListAvailable
{Skipped}
Directory: C:Program Files (x86)CiscoCisco UCS PowerToolModules
ModuleType Version    Name                                ExportedCommands
---------- -------    ----                                ----------------
Binary     1.1.2.0    CiscoUcsPS                          {Export-UcsXml, Export-UcsMoXml, Compare-UcsManagedObject, Start-UcsKvmSession...}

Import-Module -Name CiscoUcsPS
We will be working with multiple VLANs so let’s create a small vlan.csv file with the following content:
vlan_name

vlan100

vlan101

vlan102

vlan103
and save it to, for example, C:Scripts .
To add VLAN you can execute this simple script:
Connect-Ucs UCS_Manager_IPaddress -Credential (Get-Credential)
$csv = Import-Csv C:Scriptsvlan.csv
foreach ($row in $csv)
{
Get-UcsServiceProfile -Filter 'Name -ilike dc2esx*' | Get-UcsVnic | Add-UcsVnicInterface -Name $row.vlan_name
}
Disconnect-Ucs
After few second all these VLANs will be added to all Service Profiles where service profile name is like “dc2esx”.
OK, let’s remove some as well:
Connect-Ucs UCS_Manager_IPaddress -Credential (Get-Credential)
$csv = Import-Csv C:Scriptvlan.csv
foreach ($row in $csv)
{
Get-UcsServiceProfile -Filter 'Name -ilike dc2esx*' | Get-UcsVnic | Get-UcsVnicInterface -Name $row.vlan_name | Remove-UcsVnicInterface -Force | Out-File C:Scriptsvlan.log
}
Disconnect-Ucs
This time we removed all VLANs and in addition we have a log from this operation – we love logs right?
Using '-Force' option will remove a prompt “Are sure to remove object…”
Easy? Remember, Powershell is extremely powerful! Think twice before you execute any script!
And do backup! You can use Powershell for it as well:
Backup-Ucs -Type full-state -PathPattern 'C:Backups${ucs}-${yyyy}${MM}${dd}-${HH}${mm}-full-state.tar.gz'
(c) Zbigniew ‘Ziggy’ Misiak
I needed to upgrade VMware Tools on a large number of virtual machine for a customer who is currently going through a migration from VMware ESX 4.1 to VMware ESXi 5.5. The customer is also going to use Trend Micro Deep Security for the host level antivirus protection and therefore needs to install VMware Tools with vShield Driver integration.
Here is how you install / upgrade VMware Tools from the command line:
setup64.exe /S /v "/qn REBOOT=R ADDLOCAL=ALL REMOVE=Hgfs,Sync,Audio,Unity,PerfMon,WYSE,BootCamp,Debug,ThinPrint"
Where:
/S – Silent, non-GUI installation
/v – pass parameters directly to MSI
REBOOT=R – ReallySuppress the server reboot. Note The installer may indicate if a reboot is necessary by exiting with ERROR_SUCCESS_REBOOT_REQUIRED.
ADDLOCAL=ALL – Install all components locally
REMOVE=component(s) – Component or components (separated by comma) that will NOT be installed / excluded. Please refer to Names of VMware Tools Components Used in Silent Installations article to identify what components you can exclude in your environment.
There are a couple of notes on troubleshooting scripted VMware Tools installation:
- Check
%TEMP%/vmmsi.log*.log to ensure all the components have been installed as required;
- If script does not work, most likely some of the components are not applicable to the version of ESXi host or Guest OS that you run. Check
%TEMP%/vmmsi.log_YYYYMMDD_HHMMSS_Failed.log and look for errors like
“MSI (s) (F4:6C) [09:36:12:064]: Product: VMware Tools -- Error 2711.The specified Feature name ('Debug') not found in Feature table.
Error 2711.The specified Feature name ('Debug') not found in Feature table.”
In this example, remove Debug feature from the script and run it again. You may get similar message about another feature, remote it and so and so and so.
Check if VMware vShield driver is installed and running.
- Run msinfo32.exe
- Navigate to “Software Components“, “System Drivers“
- Check if the “vsepflt” / “VFileFilter” system driver is in the list and the state is Running with status OK.
Follow this link to download the latest or the old version of VMware Tools:
http://packages.vmware.com/tools/esx/latest/
Hope this will help.
Since version 4.0 EMC UIM/P is able to provision and manage VPLEX Services.
EMC VPLEX is a great product for DR solutions, for more information check out www.emc.com/vplex
In my case provisioning VPLEX service was failing with error:
VplexServiceProvisioningService Failed to do frontend masking…
VPLEX was configured as metro cluster so there were 2 Standard Services – one on Vblock A and second on Vblock B and VPLEX service created with vSphere cluster settings.
Given error was all we’ve got, there were not much more in the logs that can point us in the right direction.
After a while we noticed that all services had the same name!
This is possible in UIM because these are 3 completely different objects with different ID’s and should not conflict with each other. But, for some reason, UIM/P was unhappy about this!
Simple solution was decommission all Services, create new ones with distinguished names, for example:
My-VPLEX-Cluster-A – for Standard Service on Vblock A
My-VPLEX-Cluster-B – for Standard Service on Vblock B
My-VPLEX-Cluster – for VPLEX service
and that’s it!
(c) Zbigniew ‘Ziggy’ Misiak
|
Subscribe to Blog via Email
Join 169 other subscribers
|
Recent Comments