- Deploy UIM/P from OVF template;
- Verify the UIM/P services are running properly;
uim001:~ # service uim-service-wrapper status
uim-service-wrapper is running
- Enable JBoss JMX Console access:
uim001:~ # cd /opt/ionix-uim/tools
uim001:/opt/ionix-uim/tools # perl password-change.pl
+========================================================+
| Password Update Utility                                |
+========================================================+
| Available Commands:                                    |
|     [A]uto-Generate All Passwords                      |
|     [C]hange Single Password                           |
|     [S]ychronize from App Server                       |
|     [R]eset the 'sysadmin' account                     |
|     [Q]uit                                             |
+========================================================+
Command: c
+========================================================+
| List of Users                                          |
+--------------------------------------------------------+
| 1. system                                              |
| 2. controlDaemon                                       |
| 3. int_mod_user                                        |
| 4. homebase.admin                                      |
| 5. smi.admin                                           |
| 6. uimadaptadmin                                       |
| 7. internal                                            |
| 8. msa_user                                            |
| 9. jmx-user                                            |
+========================================================+
User (1-9): 9
New Password: type_new_password
The password for the 'jmx-user' account was successfully updated.
- Import VMware ESX/ESXi media (see HOW TO: Add new VMware vSphere ISO image to UIM/P)
- Source the profile to setup your environment and perform administrative tasks at the command line interface
uim001:/ # . /etc/voyence.conf
uim001:/ #
- Enable Security Assertion Markup Language (SAML) authentication
uim001:/ # cd /opt/ionix-uim/tools
uim001:/opt/ionix-uim/tools # perl enableSaml.pl
Script will create a SAML authenticated system administrator account and set the SAML enabled property to true
JBOSS_HOME=/opt/ionix-uim/jboss
JAVA_HOME=/usr/java/latest
Created 'samlsysadmin' user.
- Import CA-signed SSL certificate:
- Login to UIM/P as root;
- Generate a Private Key and Certificate Signing Request (CSR). NB that y default certificates are tied to the exact server name they are created for. Which is normally the FQDN of the server. If you create a certificate for the server uim001.vstrong.info and then connect by the short name uim001 / UIM001 or by any other DNS aliases, the certificate will not be seen as a trusted certificate. There is a way to get all aliases included in the certificate. Please refer to “HOW TO: Create server certificate and include DNS alias“. If you are going this route, please ignore this step.
uim001:~ # cd /opt/ionix-uim/tools/ssl
uim001:/opt/ionix-uim/tools/ssl # perl ssl-utility.pl -keygen

===============================================================================
SSL Configuration Utility
-------------------------------------------------------------------------------

This utility will generate a private key and a Certificate Signing
Request (CSR).  Note: Do not issue a private key challenge password
during the prompts to follow.  The password will be added during the
install mode.  Would you like to continue? [y/n]
y

Required certificate information:
Country Name (2 letter code): UK
State or Province Name (full name): London
Locality Name (eg, city): London
Organization Name (eg, company): vStrong.info
Organizational Unit Name (eg, section):
Server hostname: uim001.vStrong.info
Generating Private Key and CSR...
Generating a 1024 bit RSA private key
...............++++++
.......++++++
writing new private key to 'server.key'
-----
You are about to be asked to enter information that will be incorporated
into your certificate request.
What you are about to enter is what is called a Distinguished Name or a DN.
There are quite a few fields but you can leave some blank
For some fields there will be a default value,
If you enter '.', the field will be left blank.
-----
Country Name (2 letter code) [AU]:State or Province Name (full name) [Some-State]:Locality Name (eg, city) []:Organization Name (eg, company) [Internet Widgits Pty Ltd]:Organizational Unit Name (eg, section) []:Common Name (eg, YOUR name) []:Email Address []:
Please enter the following 'extra' attributes
to be sent with your certificate request
A challenge password []:An optional company name []:
Private Key created: /opt/ionix-uim/tools/ssl/server.key
Certificate Signing Request created: /opt/ionix-uim/tools/ssl/server.csr

Please send the CSR to your preferred Certificate Authority (CA).  They will
send you a certificate.  Save this certifcate to this server, and then run
this utility in the "install" mode.
The utility generates the following files:
– server.key – which is the private key
– server.csr – which is the certificate signing request (CSR)
Download server.csr file to your PC and send it to your Certificate Authority (CA) - Receive signed certificate from CA, upload it to ‘/opt/ionix-uim/tools/ssl‘ folder
- Install private key and certificate
Run perl ssl-utility.pl –install <private key file> <certificate file>
You will be prompted for a password to protect the private key and certificate.
All the product services will also be restarteduim001:/opt/ionix-uim/tools/ssl # perl ssl-utility.pl -install server.key certnew.cer =============================================================================== SSL Configuration Utility ------------------------------------------------------------------------------- This utility will install the private key and certificate into httpd, Tomcat, and JBoss's configurations. The original certificate, key, and keystore will be backed up into the /opt/ionix-uim/backup directory. Would you like to continue? [y/n] y Please create a password for the keystore: SecretPWD Stopping uim-service-wrapper service Converting base64 encoded certificate to DER format... Converting base64 encoded private key to DER format... Injecting DER certificate and DER private key into the keystore... Using keystore-file : temp/voyence-ssl.keystore One certificate, no chain. Key and certificate stored. Alias:voyence-server Password: Applying password to keystore... Using the Common Name from the certificate: uim001.vstrong.info Installing Apache certificate... copying /opt/ionix-uim/conf/server.crt to /opt/ionix-uim/backup/server.crt Installing Apache private key... copying /opt/ionix-uim/conf/server.key to /opt/ionix-uim/backup/server.key Installing JBoss keystore... copying /opt/ionix-uim/jboss/server/vc-server/deploy/1vc.sar/voyence-ssl.keystore to /opt/ionix-uim/backup/voyence-ssl.keystore Installing SLM Tomcat keystore... copying /opt/ionix-uim/slm/conf/.keystore to /opt/ionix-uim/backup/.keystore Installing HomeBase keystore... copying /opt/ionix-uim/bmp/keys/ssl.keystore to /opt/ionix-uim/backup/ssl.keystore.1 Starting service uim-service-wrapper SSL Configuration is complete.
- Install UCS Manager certificateUPDATE: If you installing EMC Ionix UIM/P 3.2 and later, please skip steps 8.1 to 8.3, these steps for UIM/P 3.1.*.
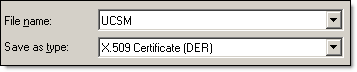
- Export UCS Manager certificate to DER encoded binary X.509 (.CER) format
- Export from the web browser, rename to *.cer:
OR - In UCS Manager open Admin tab, Filter – All, Key Management, KeyRing default. Open Certificate, highlight the certificate and save it to a text file as *.cer
- Export from the web browser, rename to *.cer:
- Upload .CER file to /opt/ionix-uim/conf/CA
- Convert .CER file to .CRT file:
openssl x509 -inform DER -in UCSM.cer -out UCSM.crt
- Install UCS Manager certificate in UIM/P
- UIM/P 3.1:
uim001:/opt/ionix-uim/conf/CA # openssl x509 -inform DER -in UCSM.cer -out UCSM.crt
uim001:/opt/ionix-uim/conf/CA # ./cert_hash.pl
Installing:UCSM.crt....
Installing:voyenceca.crt....
- UIM/P 3.2:
vim001:/opt/ionix-uim/tools/ssl # cd /opt/ionix-uim/tools
vim001:/opt/ionix-uim/tools # ./importUcsCertificate.pl
UCS IP Address: 192.168.100.30

Retrieving certificate from 192.168.100.30

Certificate details for 192.168.100.30:
--------------------------------------------------------------------------------
Certificate:
Data:
Version: 3 (0x2)
Serial Number:
f5:18:24:1a:bb:f2:af:94
Signature Algorithm: sha1WithRSAEncryption
Issuer: CN=UCSM001
Validity
Not Before: Dec  5 14:38:42 2012 GMT
Not After : Dec  5 14:38:42 2013 GMT
Subject: CN=UCSM001
Subject Public Key Info:
<CERTIFICATE DETAILS>
--------------------------------------------------------------------------------
Would you like to import this certificate into UIM/P? [y/n] y
Importing the certificate into UIM/P

Installing:importedCertificate-144141.crt....
Installing:voyenceca.crt....

You must now restart device services to reload the certificate cache.
Please make sure there are no provisioning or other tasks running and
then issue this command:
service uim-device-services restart
- UIM/P 3.1:
- Restart UIM services
You must now restart device services to reload the certificate cache.
Please make sure there are no provisioning or other tasks running and
then issue this command:
service uim-device-services restart

uim001:/opt/ionix-uim/conf/CA # service uim-device-services restart
Stopping uim-device-services
done
Starting uim-device-services
Device Master Service started
Device Service started
done
- Export UCS Manager certificate to DER encoded binary X.509 (.CER) format
- If you desire, you can change UIM/P default sysadmin password (it is ‘sysadmin’ BTW)
- Login to UIM/P web interface and click on UIM Configuration Center icon in the right top corner

- Under Online User Guide click on Change Password and click OK

- Login to UIM/P web interface and click on UIM Configuration Center icon in the right top corner
- OK, UIM/P is installed and configured.
Please proceed to HOW TO: Add/Discover Vblock in EMC UIM/P post.
Hi,
I was wondering what happens after running the enablesaml.pl script? I ran it, but nothing seems to have changed. When I check the logs,
there doesn’t seem to be any SAML assertions going through. Any insight would be appreciated.
Hi Shitiz,
Where did you find this script? What version are you using? I’ve checked 4.0 and 4.1 and it’s not there. I’m not sure what it does.
Regards
Ziggy
Hey Ziggy,
I found it in the /opt/ionix-uim/tools directory. I am using 9.2.2a NCM. According to the documentation it’s supposed to enable SAML authentication and create a ‘samlsysadmin’ user. I ran the script according to the directions but i dont think anything changed besides it saying: Created ‘samlsysadmin’ user.
Thanks,
Shitiz
Sorry, it is in 4.0 and it’s discontinued from 4.1. I was used to create SAML admin account and and set the SAML enabled property to true. And what is the issue? What are you trying to accomplish?
I was trying to set up SAML authentication on the NCM. I happened to find the user in the system administration, but I’m still having trouble authenticating the account. The script worked, but there seems to be some other internal problems going on. I keep getting “2014-07-14 13:47:42,267 ERROR [SAML] Login token not found in active login token cache for user – samlsysadmin” in my saml.log file when I try to login using that user. I’ll try to figure it out, thanks though.
im getting this after updating UIMP
/opt/ionix-uim/tools/ssl # service uim-service-wrapper status
uim-service-wrapper is not running
The following services are not running:
apache2
Dont mind me worked it out. was a key mismatch. checked the /var/log/apache2/error_log
Similar issue to this one: http://www.vstrong.info/2012/11/21/emc-uimp-upgrade-failed/ ?